Use Label Maker and Amazon SageMaker to automatically map buildings in Vietnam
- Estimated
- 8 min read
Zhuangfang Yi, PhD Explains how to quickly train and deploy an MXNet on Amazon Web Services

January 19, 2018 from Development Seed’s Blog
Last week we released Label Maker, a tool that quickly prepares satellite imagery training data for machine learning workflows. We built Label Maker to simplify the process of training machine learning from image classification, object detection and semantic segmentation with Tensor Flow or MXNet. It’s as simple as pip install label-maker and will allow you to have ready-to-use training data in four easy commands.
Today we will show you how you can create a building classifier to detect buildings in Vietnam. In this example, Label Maker will pull data from Mapbox Satellite and OpenStreetMap and prepare training data that is ready-to-use with MXNet in Amazon SageMaker. Amazon SageMaker is a new service from Amazon Web Services (AWS) that enables users to develop, train, deploy and scale machine learning approaches in a fairly straightforward way.
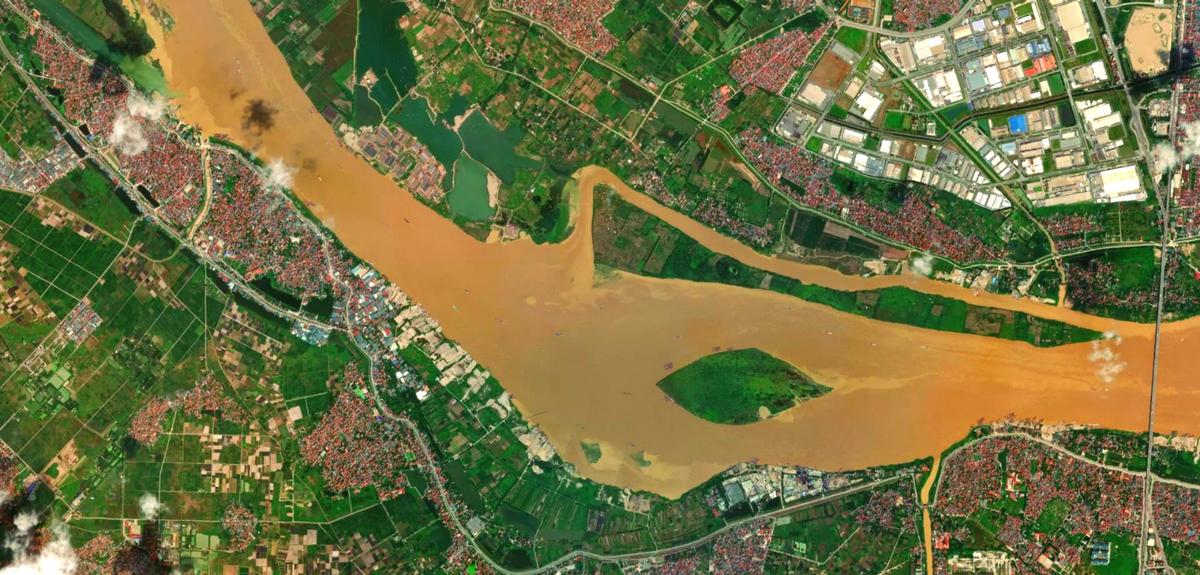
Vietnam presents some interesting challenges for building classification: as one of the tropical countries in Asia, Vietnam has a broad range of land use types as well as building styles. You can see the stark difference in terrain between the dark green tropical forests, tiered rice paddies, and dusty deforested areas. For this reason it’ll be important to have data that is representative of each of these regions. This is why building detection algorithms trained on Western data don’t perform as well in Vietnam.
Getting Started
For this exercise, you will need:
-
Label Maker and tippecanoe installed.
-
A Mapbox account and their satellite imagery access token.
-
An SageMaker instance account through your AWS account. We are going to use an
ml.p2.xlargeGPU machine for this case and you’ll need to test and run the instance for about five hours which will cost less than $10 ($1.26 per hour inus-east-1). Don’t forget to stop and delete the instance after you’re done with training or it will end up being costly.
Label maker takes a JSON file that defines your area of interest, data sources, and how you will use the data. We’ll slightly modify the JSON file from another walkthroughto create this vietnam.json file:
`{
  "country": "vietnam",
  "bounding_box": [105.42, 20.75, 106.41, 21.53],
  "zoom": 17,
  "classes": [
    { "name": "Buildings", "filter": ["has", "building"] }
  ],
  "imagery": "http://a.tiles.mapbox.com/v4/mapbox.satellite/{z}/{x}/{y}.jpg?access_token=ACCESS_TOKEN",
  "background_ratio": 1,
  "ml_type": "classification"
}`-
countryandbounding_box: changed to indicate the location in Vietnam to download data from. -
zoom: Buildings in Vietnam have quite a variety in size, so zoom 17 (roughly 1.2m resolution) will allow us to spot building(s) in the tile. We found Hanoi, Vietnam has very good imagery through Mapbox. If you are interested in training a model in another area you can check if the area has imagery at the zoom level you need at geojson.io. The higher the zoom level, the higher the imagery resolution is. If you are not sure how to set upclasses,imagery,background_ratioandml_typeconfiguration, you will find this walkthrough helpful.
Training data generation
Follow the CLI commands from the README. We’ll use a separate folder, called vietnam_building, to keep our project well-managed.
`label-maker download --dest vietnam_building --config vietnam.json
label-maker labels --dest vietnam_building --config vietnam.json`
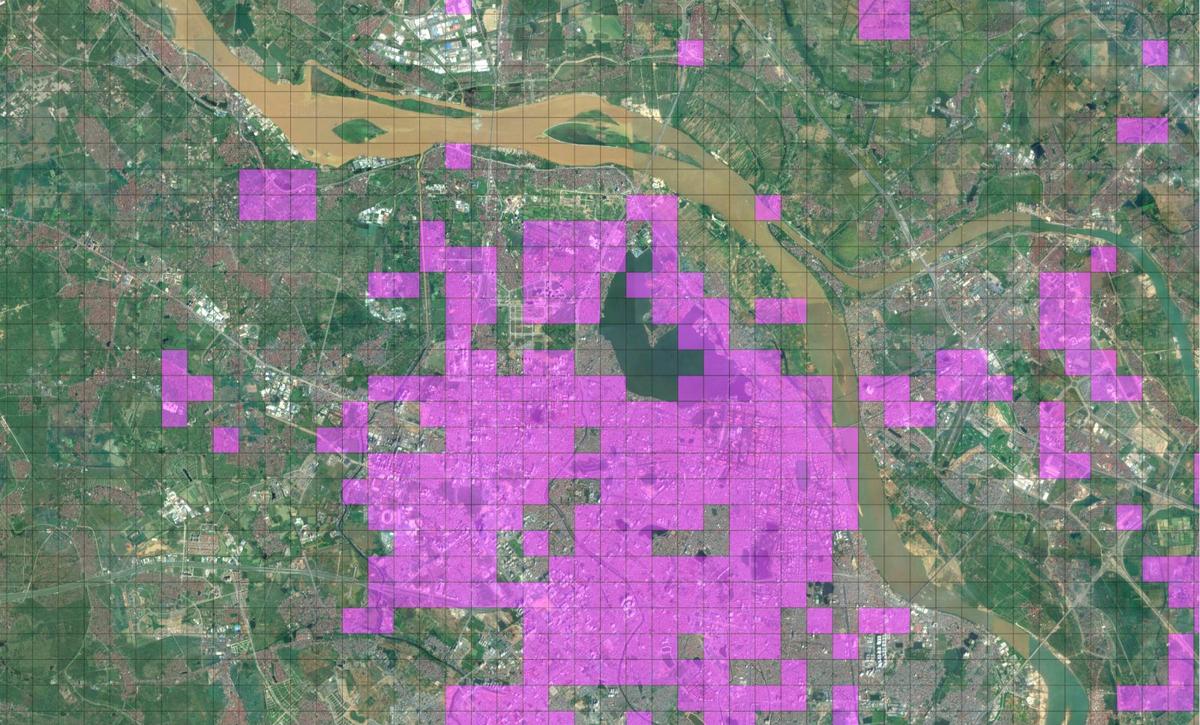
These commands will download and retile the OpenStreetMap QA tiles and create our label data as labels.npz. This process will also produce another file classifcation.geojson; you can inspect it to see the geographic distribution of the building labels. Using QGIS to style the file, you can create an image, similar to what is shown below, where purple colored tiles represent building labels.

Before you start training, you can preview the data to make sure it will work for your goals by running this on the command line:
`label-maker preview -n 10 --dest vietnam_building --config vietnam.json`If you’re using the same vietnam.json configuration file, you can expect to see the three tiles below in your folder vietnam_building/examples.

When you’re ready, use the following commands to download all 2,290 imagery tiles. The following commands will create a tiles folder with all of the downloaded imagery and a data.npz file. If you want to download fewer tiles you can adjust the bounding box above in the JSON file. The bounding box is organized as [xmin, ymin, xmax, ymax]; by selecting a smaller bounding box in the configuration JSON file, it will cover a smaller geographic area.
`label-maker images --dest vietnam_building --config vietnam.json
label-maker package --dest vietnam_building --config vietnam.json`
Getting SageMaker setup
SageMaker reads training data directly from AWS S3. You will need to place the data.npz in your S3 bucket. In order to transfer files from your local machine to S3, you can use the AWS Command Line Tool, Cyberduck, or FileZilla.
Login to your AWS account and go to the SageMaker home page. We ran our example Amazon SageMaker instance in us-east-1 and we recommend using S3 data located in the same region. Now create a notebook instance!

Click on Create notebook Instance. You will have three instance options, ml.t2.medium, ml.m4.xlarge and ml.p2.xlarge to choose from. We recommend you use the p2 machine (a GPU machine) to train this image classification.
Once you have your p2 instance notebook set up, you’re ready to train a classifier. Specifically, you’ll learn how to plug your own script into Amazon SageMaker MXNet Estimator and train the classifier we prepared for detecting buildings in images.
Train the model with MXNet
Training a LeNet styled building classifier using MXNet Estimator:
-
Copy and upload the
[SageMaker_mx-lenet.ipynbnotebook](https://github.com/developmentseed/label-maker/blob/master/examples/nets/SageMaker_mx-lenet.ipynb) to your notebook instance. We have a LeNet styled MXNet customized for this task, and you’ll only need to execute the first cellmx_lenet_sagemaker.pyusingShift-Enter. -
The second cell in the notebook calls the first script as the entry-point to run SageMaker MXNet Estimator.
`from sagemaker.mxnet import MXNet
from sagemaker import get_execution_role`

mxnet_estimator = MXNet("mx_lenet_sagemaker.py",
                        role=get_execution_role(),
                        train_instance_type="ml.p2.xlarge",
                        train_instance_count=1)
mxnet_estimator.fit("s3://") ## give your s3 bucket URL here.
The detailed arguments of the above Python codes make up an MXNet Estimator:
-
The customized LeNet styled MXNet
mx_lenet_sagemaker.py. -
Your SageMaker
rolecan be obtained withget_execution_role. -
The
train_instance_typeused, we recommend the GPU instanceml.p2.xlargehere. -
The
train_instance_countis equal to 1, which means we’re going to train this LeNet on only one machine. You can also train the model with multiple machines using SageMaker. -
Pass your training data to
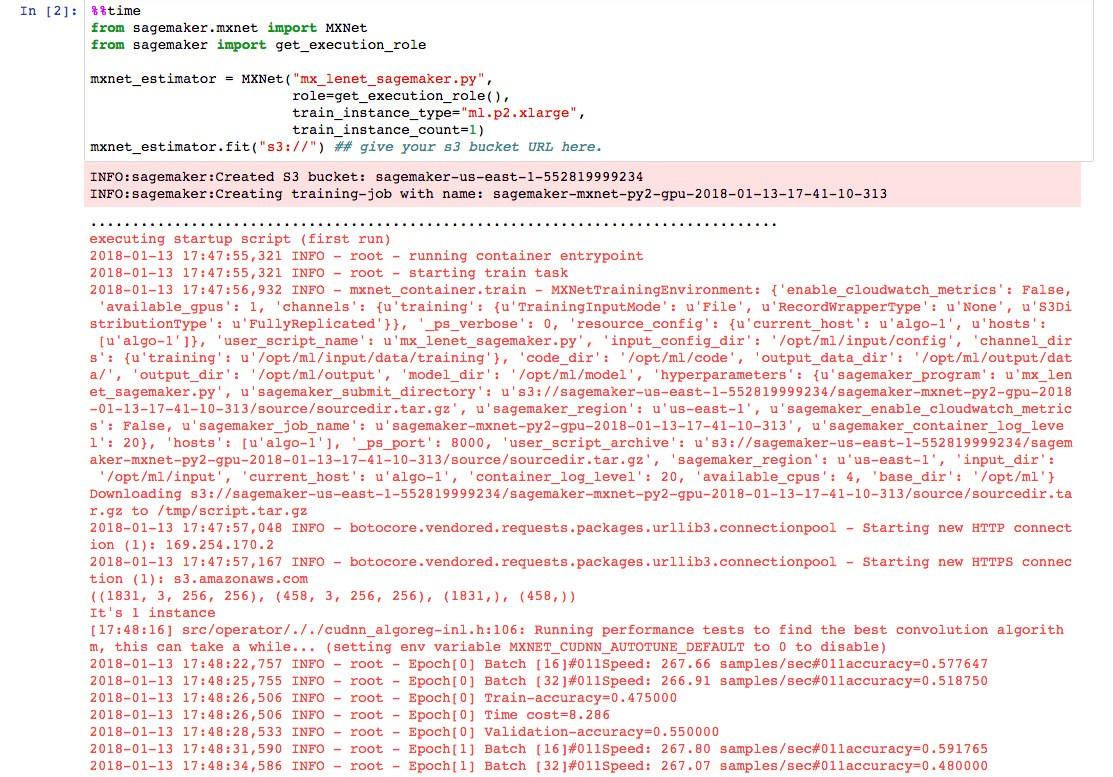
mxnet_estimator.fit()from an S3 bucket. When SageMaker runs successfully, you’ll see a log like the image below. -
Using
mxnet_estimator.deploy(), you can use the SageMaker MXNet model server to host your trained model. -
Now you’re ready to read or download test tiles from your S3 bucket using Boto3like we show in the IPython Notebook. After this, you should be able to make a prediction from your trained model.

Reflections on the model
In the end, you’ll have a building classifier model with around 75% accuracy on the validation data. The lower accuracy could be due to a few factors:
-
Hanoi developed very rapidly in recent years and the OpenStreetMap community hasn’t caught up with mapping new residential and commercial buildings yet. This will cause some of the building class labels to be inaccurate. If you’d like to help improve the labelling accuracy, start mapping on OpenStreetMap.
-
Training an image classifier from scratch, like the example we’re using here, can easily end up overfitting the model. We’re adding a few methods to avoid this (like a dropout layer) but this can affect the overall accuracy. In other situations we would recommend first trying transfer learning on top of trained model weights, e.g. from ImageNet.
-
In this example, we’re using LeNet, a straightforward and small memory footprint network. We added a droupout layer, and additional convolutional layer on top of the original LeNet to balance out overfitting and under-fitting. Still, it can be tough for this architecture to learn complicated content from satellite imagery. We think a LeNet styled model is a good baseline model, but we’re eager to see what networks you build on top of this case.
For training a production image classification model, we recommend you start training the model with more accurate OpenStreetMap labels and do transfer learning on top of an already trained model.
Reflection on SageMaker
This was my first time using SageMaker. Training image classification with SageMaker has been pretty straightforward. The Amazon SageMaker team created some easy to follow cases. You can also check out their SDK GitHub repository and an Apache MXNet Example. As this is a new and under-development platform, it only has t2, m4 and p2 machines in SageMaker for users to run Notebook Instances. The p2 is the only GPU machine and for any computer vision machine learning case it can end up being expensive. For someone highly accustomed to creating machine learning instances on the cloud, some parts of the process take SageMaker more time than if you were to set them up yourself on AWS deep learning AMIs. As SageMaker matures, I expect it will provide more options and time/cost savings.
Let us know how you’re using Label Maker or SageMaker — we’re excited to hear your data stories.
TOPICS: OPEN DATA MACHINE LEARNING SATELLITE IMAGERY
What we're doing.
Latest